
Reports
Building a report from photos on your computer
Photograph on site the way you always do, with your phone or camera. Back at your desk you put everything into Kadero at once and turn it into the report.
When you create the project, choose Foto-upload + web. See Getting started.
Uploading your photos
Open the project and go to Foto's. Drag your photos onto the screen, or click to select them. You put them all in at once.
They arrive under Nog niet ingedeeld. At the top you see how many are already in the report.
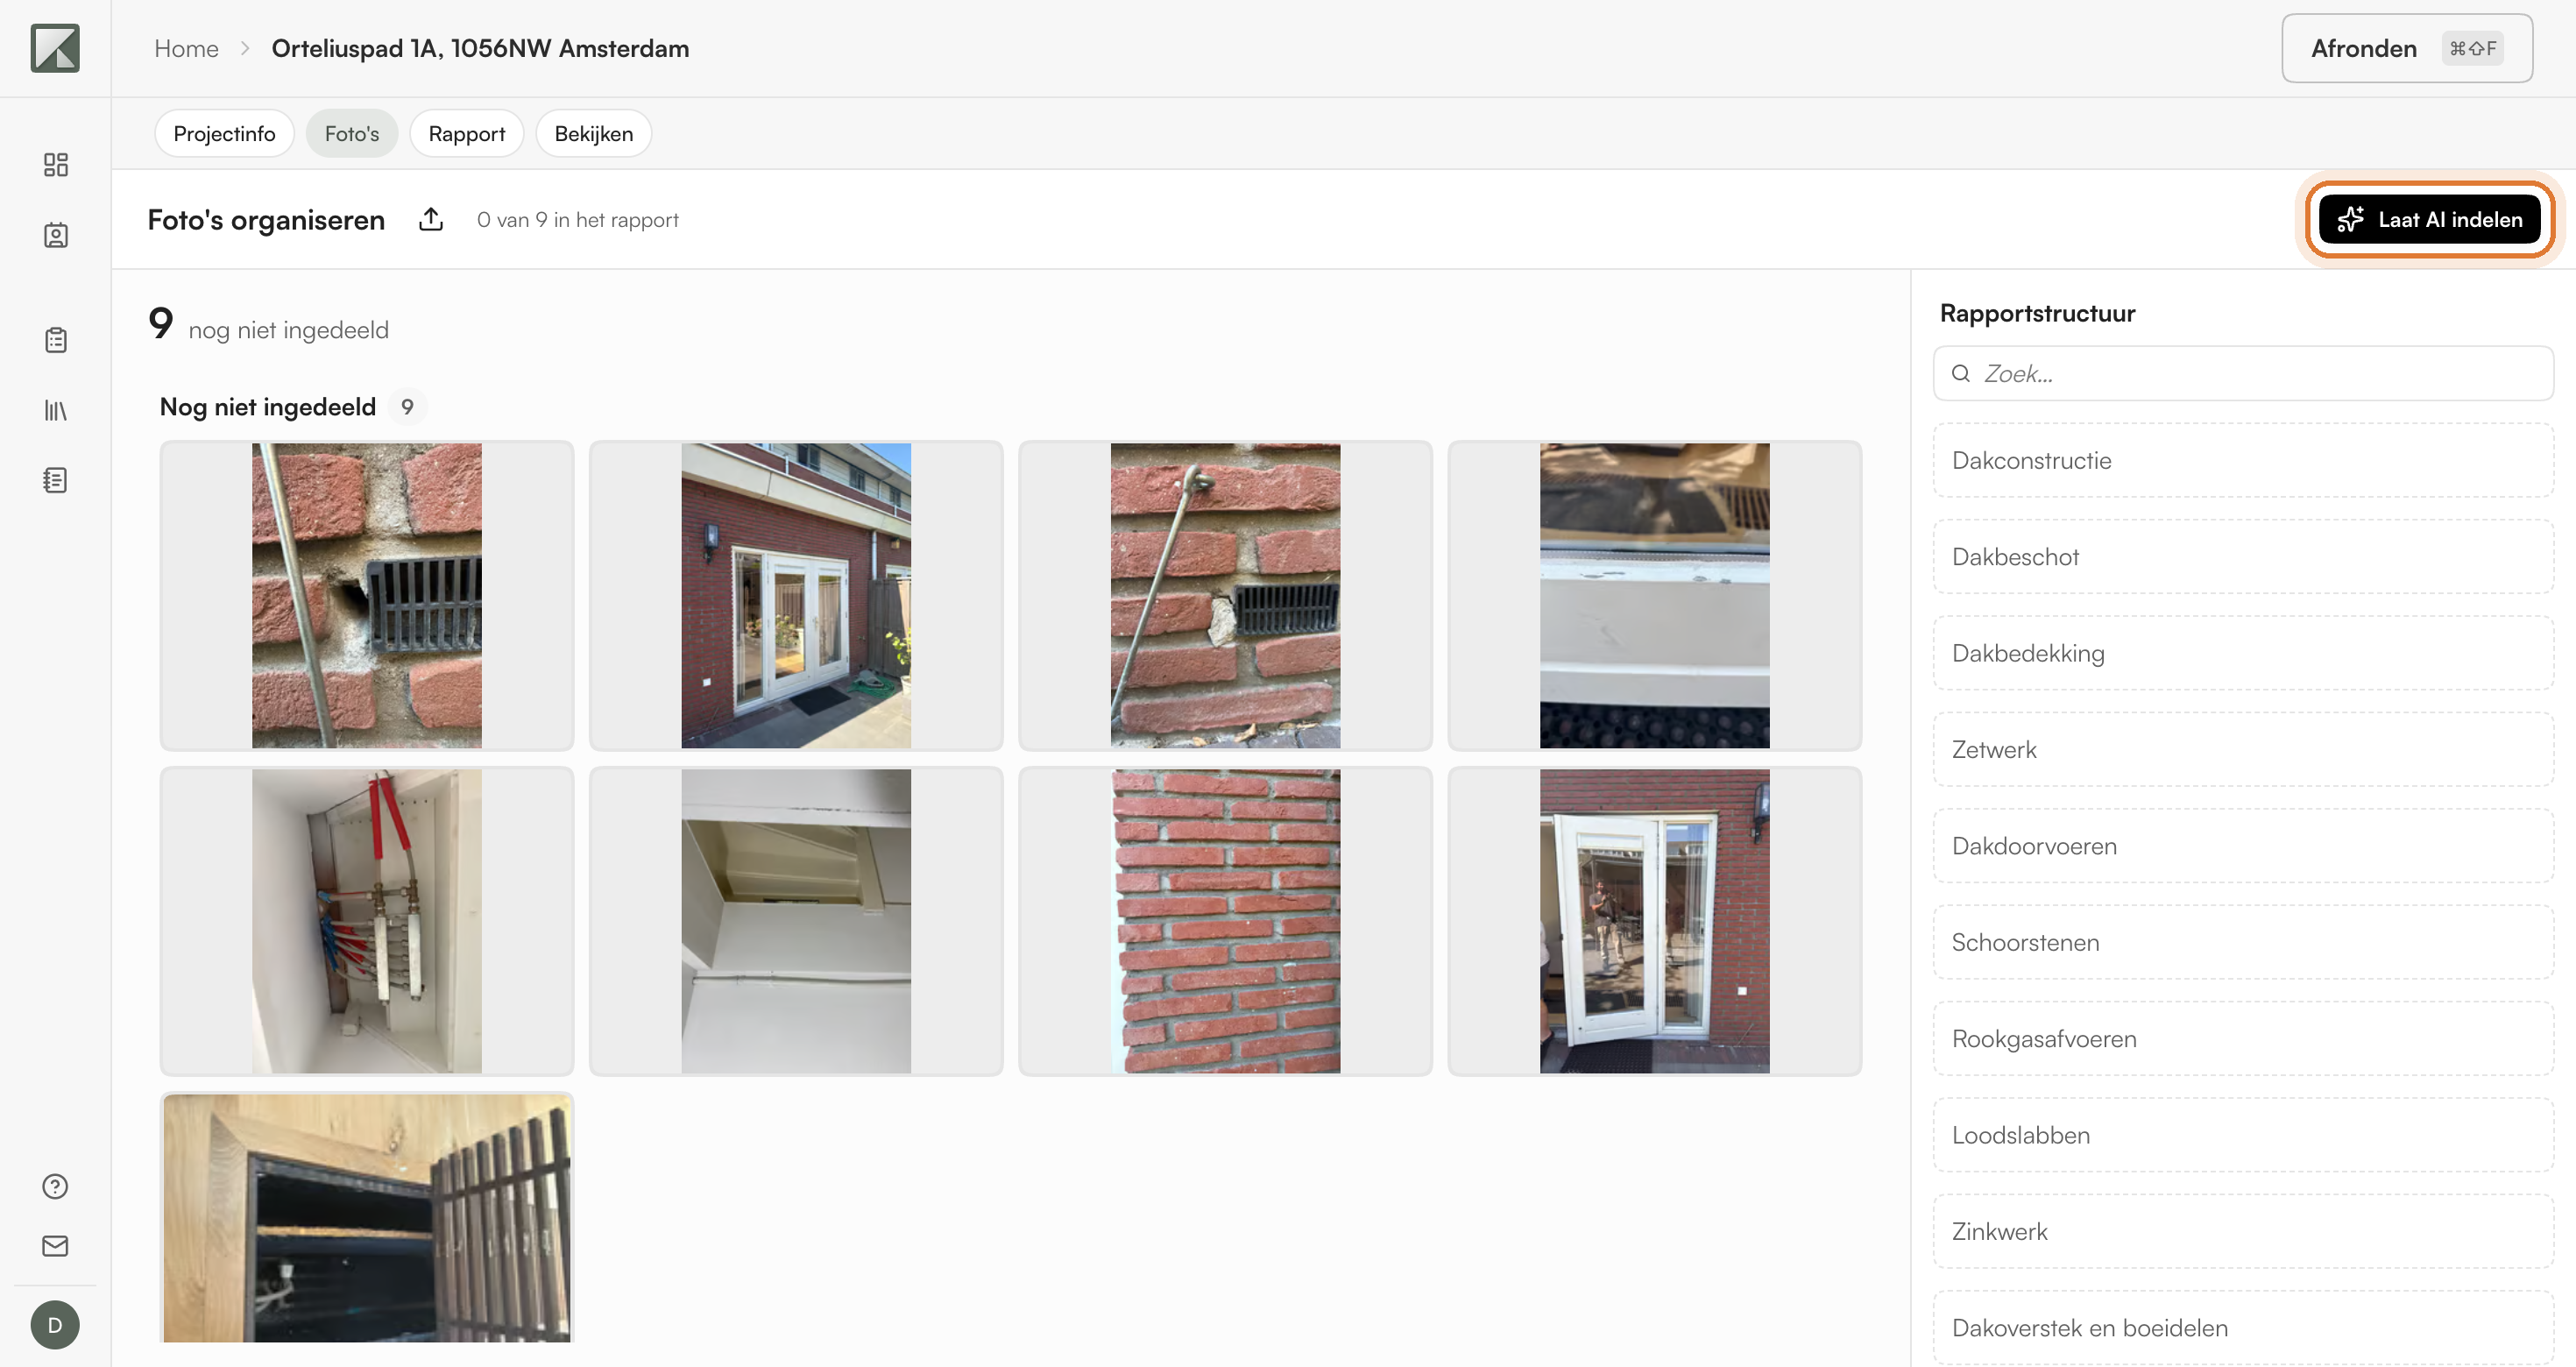
Assigning photos to an element
On the right is the Rapportstructuur, the make-up of this report. For an inspection by element those are the elements; for a baseline survey or a delivery inspection they are the rooms with their surfaces. Drag a photo to where it belongs. Several at once works too: select them and drag them together.
If something is missing, add it at the bottom.
If you work by element, you can get a head start with Laat AI indelen. For an inspection by room that button is not there, so you sort the photos yourself. Kadero spreads your photos across the elements it recognises. Whatever it sorted stays marked, so you can see what to check. If something is wrong, drag the photo to the right element, or reset everything you have not touched yet, all at once.
From photos to findings
Go to Rapport. Every element with photos has its own place in the report, with your photos already there.
Per element you write down what you see. Typing works, so does speaking: click the microphone and describe what is going on. Then choose Zo opslaan to keep your own words, or Verbeteren met AI to turn it into report language.
Record the condition grade as well, and add the costs that go with it.
If an element has no finding, mark it without one: Niet geïnspecteerd or Nader onderzoek. See Editing a report.
The whole editor is described in Editing a report.
Finishing
Under Bekijken you see the report as your client receives it. If everything is right, finish it under Afronden.